The Ultimate Implementation Guide to HubSpot Lead Routing
Routera Team
Content Team

Different businesses will have different lead routing strategies. For example, sales reps may work with Account Based matching, that is if a lead from an existing company submits a form, this lead would be assigned to the representative who already owns the company. Most businesses use a round robin distribution, which assigns evenly amongst a team, ensuring each representative gets the same amount of opportunity.
Implementing lead routing in HubSpot can seem complicated, but I'll break it down into some simple steps. We will start by discussing the types of lead routing processes for each department:
- Marketing: Lead routing for marketing may include distributing leads that are not sales ready to marketing nurture campaigns.
- Sales: Distributing incoming leads that are sales ready across a sales team, maybe this is based on the region the lead is coming in from.
- Service: Service teams may receive incoming customer support tickets and these tickets may need to be routed to the correct support rep who is available and ready to solve for the customer.
Considerations Before Setting Up Lead Routing
Every business has its own unique go-to-market strategy. Before implementing lead routing in your organization, consider these fundamental questions with your entire revenue team:
- Lead Entry Points: How do leads initially get into your CRM system?
- Initial Processing: What happens automatically when new leads enter the system?
- Distribution Criteria: What factors determine when and how leads should be assigned to team members? (Consider specific interests, property values, qualification status, and behavioral patterns)
- Sales Engagement Timing: At what point should sales representatives and account executives interact with leads?
- Qualification Standards: What criteria define marketing-qualified and sales-qualified leads in your organization?
Once you've clarified these aspects, you'll have a comprehensive view of your lead flow process. The next step is connecting this process to specific HubSpot properties.
For instance, if your qualification criteria require companies to have at least 100 employees, you need to identify which HubSpot CRM property stores this information. This mapping is essential because you'll need to configure your system to collect and utilize the right data points to make your lead routing framework operational.
Common Lead Routing Strategies
HubSpot's workflow tools support several routing approaches:
- Round-robin distribution
- Territory-based routing
- Custom routing based on specific criteria (industry, lead score, etc.)
Implementing Lead Routing in HubSpot
To set up lead routing, navigate to the Automation menu and access the Workflows feature. From there, you can create custom workflows that automatically assign leads to appropriate team members based on your predefined rules and conditions.
This automation helps ensure timely follow-up and proper lead management across your sales organization.
Step 1: Navigate to your HubSpot workflows
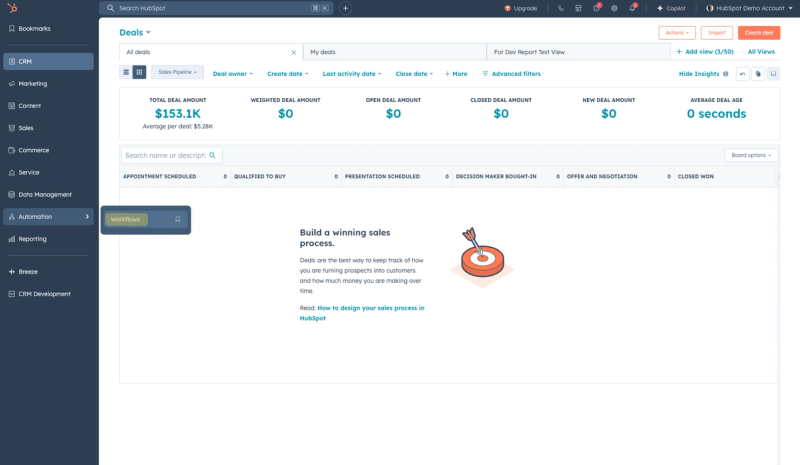
Workflows is an automation tool that allows you to make automated actions when specific triggers occur. The workflow we will be building here is going to take any contact that has submitted a form, and assign them to a specific specialized sales representative based on the region of the contact.
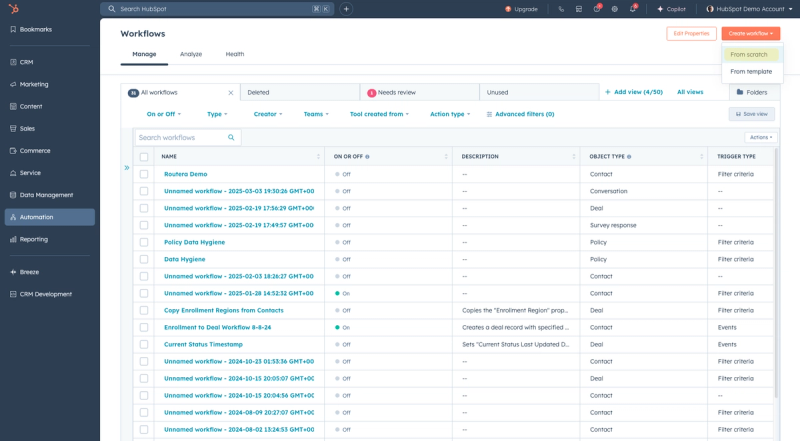
Step 2: Create a new HubSpot workflow from scratch
Once you've navigated to the workflows, let's go ahead and create a new workflow. To do this, click on
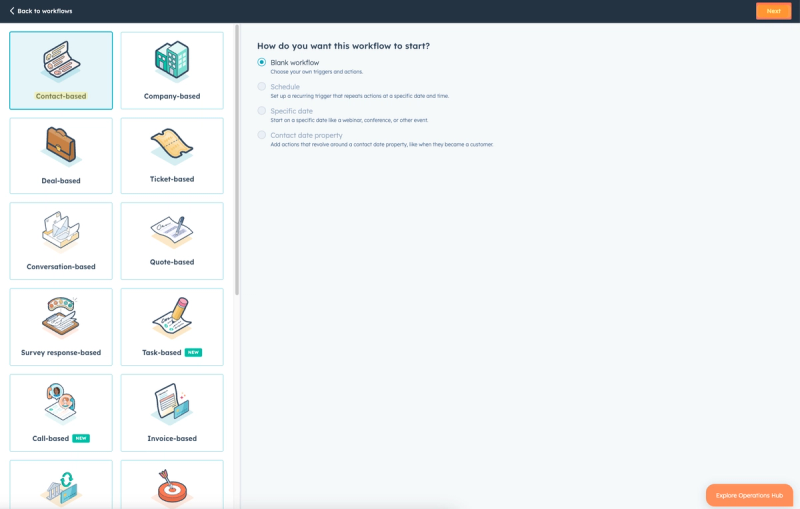
Step 3: Select the object you will be routing
Depending on your use case, you may not be routing contacts. HubSpot has four default objects; contacts, companies, deals and tickets - but if you're on an enterprise version you can also route custom objects that you may have created.
Step 4: Name the workflow and select the enrollment trigger
Start by naming your workflow, in this case we'll call it "Contact Form Lead Assignment." Once you've named the workflow, let's go ahead and add the enrollment trigger.
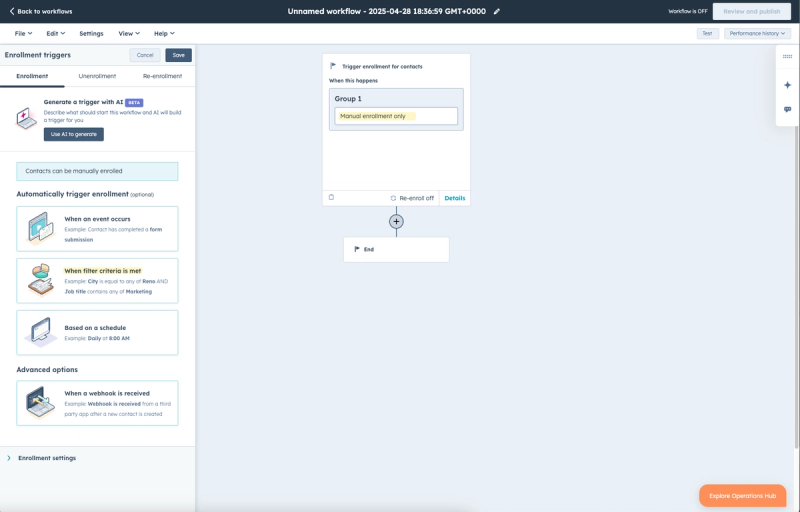
There are different enrollment triggers, but here we will use a specific filter criteria, in this case being that the contact has submitted a specific contact form. You could also create your own criteria based on a set of contact properties, or other events like a CTA being clicked.
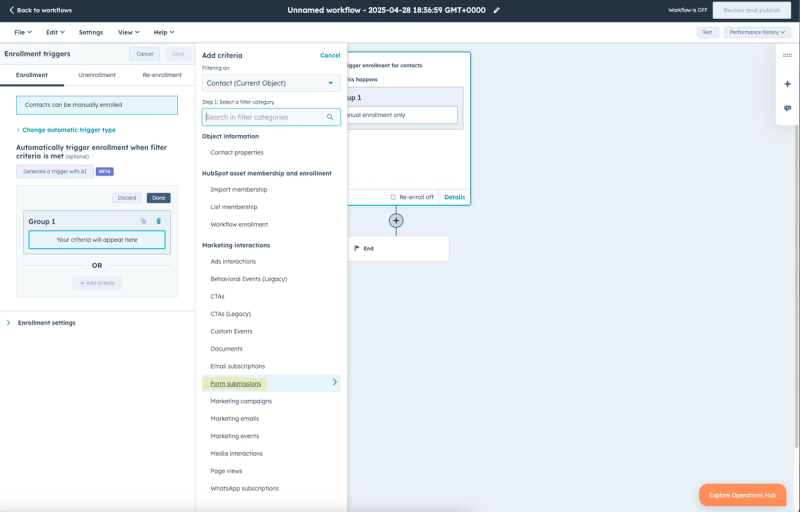
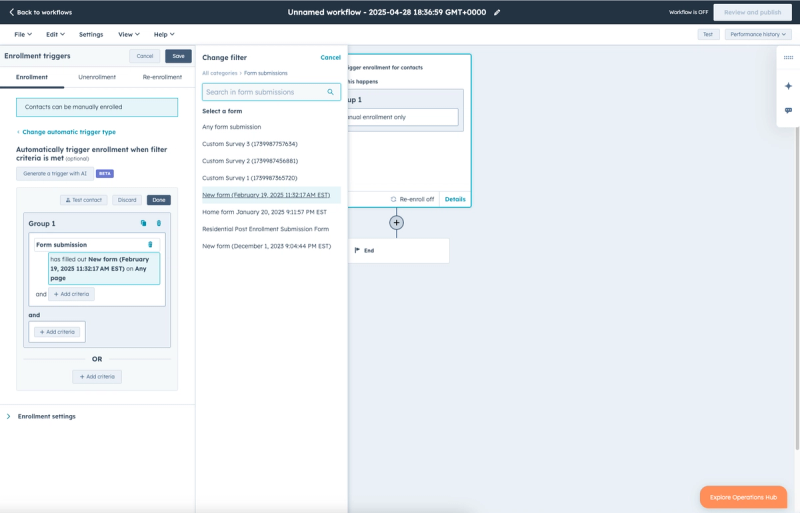
Once you've selected form submissions, select the specific form.
Step 5: Qualify leads or Segment leads
If you want to qualify the leads before they are assigned to a sales representative, or you want to segment them, you'll need to add a conditional branch.
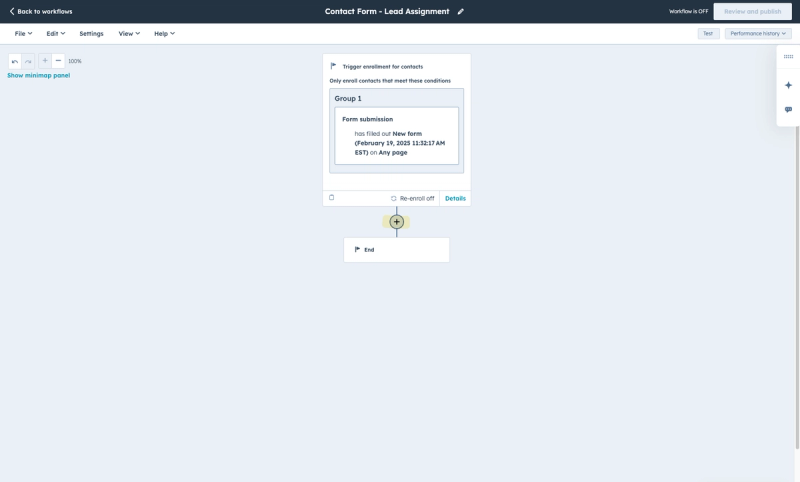
Once you've clicked the plus button and added a branch, you will be prompted to select the criteria for this specific conditional.
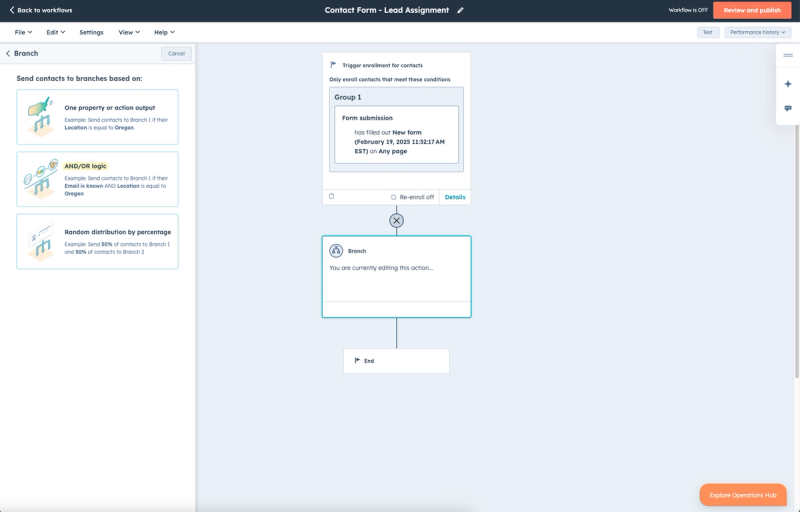
Once you've selected this option, you'll be able to set the criteria for each branch. In this example I've branched out based on a few specific state regions:
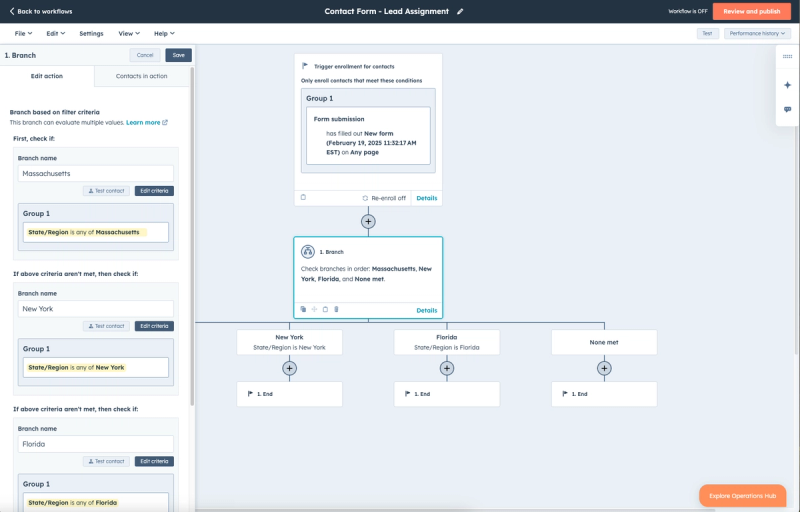
Keep in mind the order you put these conditionals does matter in the case that you are using a property that can hold multiple values (multiple select, etc.) For example, someone may be interested in different products. If a contact has selected interest in Product A and Product B, when branching out in the assignment workflow, if the first branch is checking Product A - the lead will fall into this branch first, as this is the first in the order of conditionals. Meaning, the contact will be assigned to the rep that works with product A, and not to the rep that works product B (since checking this conditional comes after checking for product A.)
Step 6: Assign leads with the "Route to Owner" action
You'll want to add this action to each branch to ensure contacts from each state are assigned to the correct sales rep.
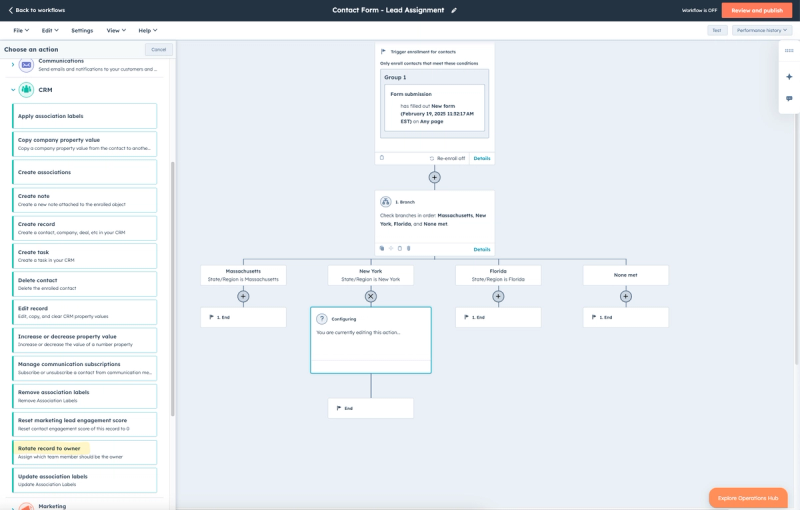
This action here will be the most important step in this entire workflow, and typically the step that is modified and managed the most.
Here you can also chose to overwrite existing owner if the contact should be assigned a new owner even if they already have one. This is typical in a reassignment lead rotation.
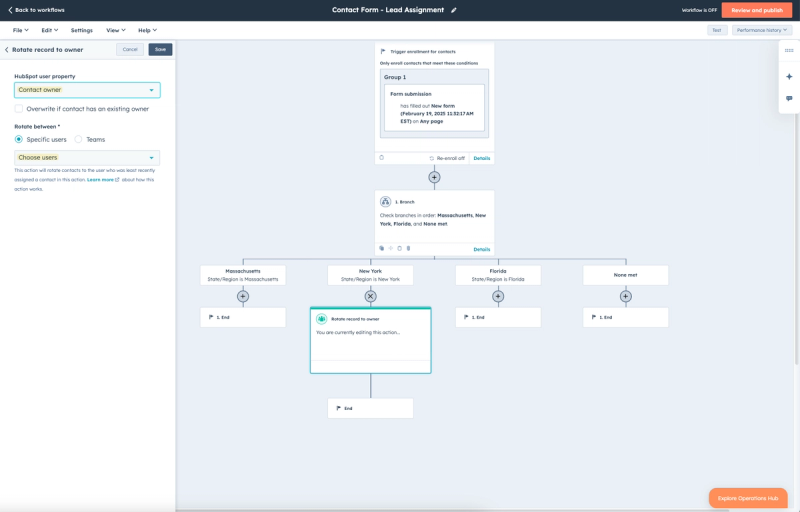
As users are added/removed from rotations. After this action you may also have specific timestamp properties to better record when reps are assigned leads and how long they take to work them.
HubSpot Lead Routing Best Practices
HubSpot's comprehensive platform offers powerful tools for configuring and managing lead routing—a critical component for sales efficiency. To maximize the effectiveness of your lead routing strategy, implement these best practices:
Regular Review and Adjustment
Continuously evaluate and refine your lead routing rules to match current performance metrics and business conditions. This ongoing optimization ensures your routing strategy evolves with your business, leading to improved conversion rates and sales outcomes.
Leverage HubSpot Analytics
Take full advantage of HubSpot's built-in routing reports and analytics capabilities. These tools provide valuable insights into routing performance, helping you identify potential bottlenecks and optimization opportunities. Embracing this data-driven approach enables smarter decision-making and more efficient workflow design.
Encourage Cross-Team Collaboration
Foster strong communication channels between your marketing and sales teams. When these departments regularly share insights and feedback, your lead routing process becomes more effective and responsive. This collaborative environment ensures leads move smoothly through your pipeline and receive the right attention at the right time.
Lead Routing Limitations in HubSpot
HubSpot provides a lot of functionality within the workflows to manage your lead routing. But note there are some limitations of what can and can't be done.
1. No performance/weighted assignment (or upgrade to Operations Hub to run a custom code)
2. No availability based assignment
3. No workload based assignment
4. Hard to maintain workflows - easy to break and something goes wrong + maintain in multiple workflows sometimes hundreds.
How to manage ongoing lead rotations in HubSpot?
Managing lead rotations requires going into the workflows that you added these rotate record to owner actions. This can be cumbersome, especially if you have multiple workflows and many if/then conditionals.
Routera provides a solution for this, by giving sales managers and users an assignment status which if marked ON the owner will be assigned leads, and if OFF then they will not receive any leads.
This is important to manage especially when users are out of the office, work specific shifts/hours, are on vacation.
When re-publishing your workflow after potentially changing enrollment criteria ensure you select "Save and don't enroll existing contacts"as if you select the other option you will enroll all contacts who currently met the criteria, maybe leading to problems of leads being reassigned.
Routera Team
Content Team