
 Go back
Managing your lead distribution in your CRM can be complicated. Typically involving multiple workflows, different teams, and a list of users and constantly changing availability.
We built Routera to easily manage and improve your lead distribution.
So instead of having leads assigned to reps who are unavailable, and lead constantly falling through the cracks - now you can easily manage user availability + out of office dates, measure each users success.
Here's a simple guide on how you can implement Routera to HubSpot and the benefits
How to implement Routera in 5 steps?
Step 1: Sign up for a free account here
Signing up is completely free.
Our free plan allows you to add 5 users to your lead router and have unlimited assignments. If you have more than 5 users you can learn more about our pricing here.
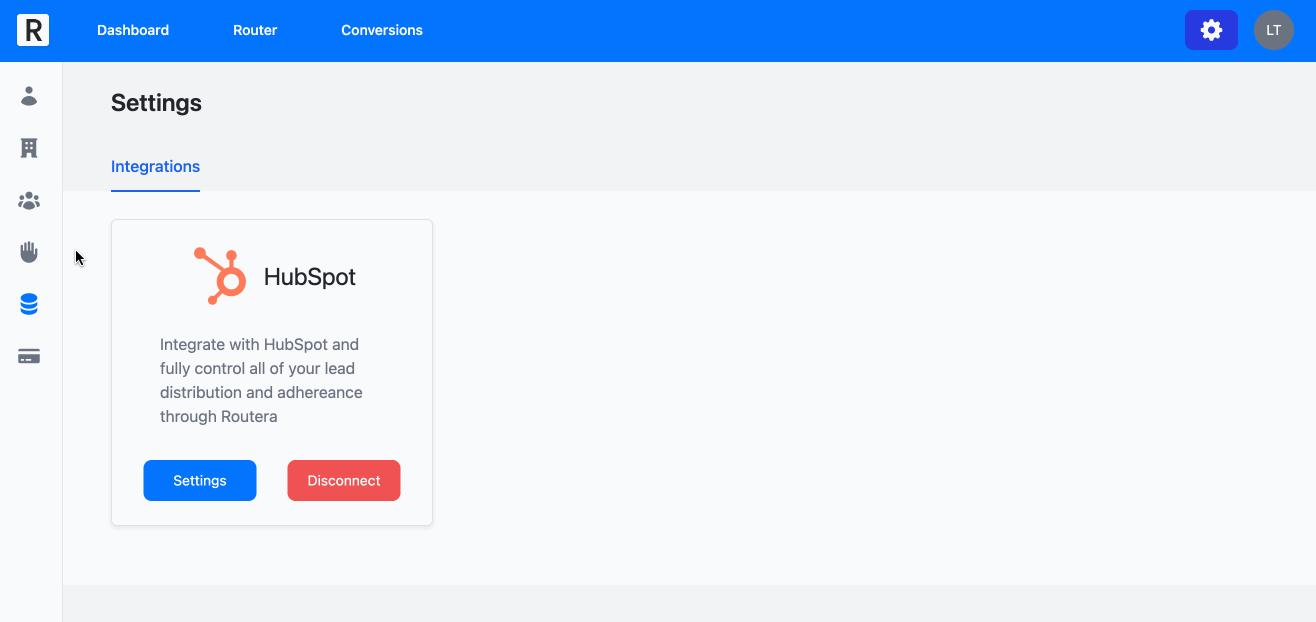
Step 2: Integrate with HubSpot via the integrations page
Once you've logged in, you can easily integrate with your HubSpot CRM or a sandbox account
to test out our lead routing feature.
- 1. Navigate to the integrations page
- 2. Click connect on the HubSpot integration
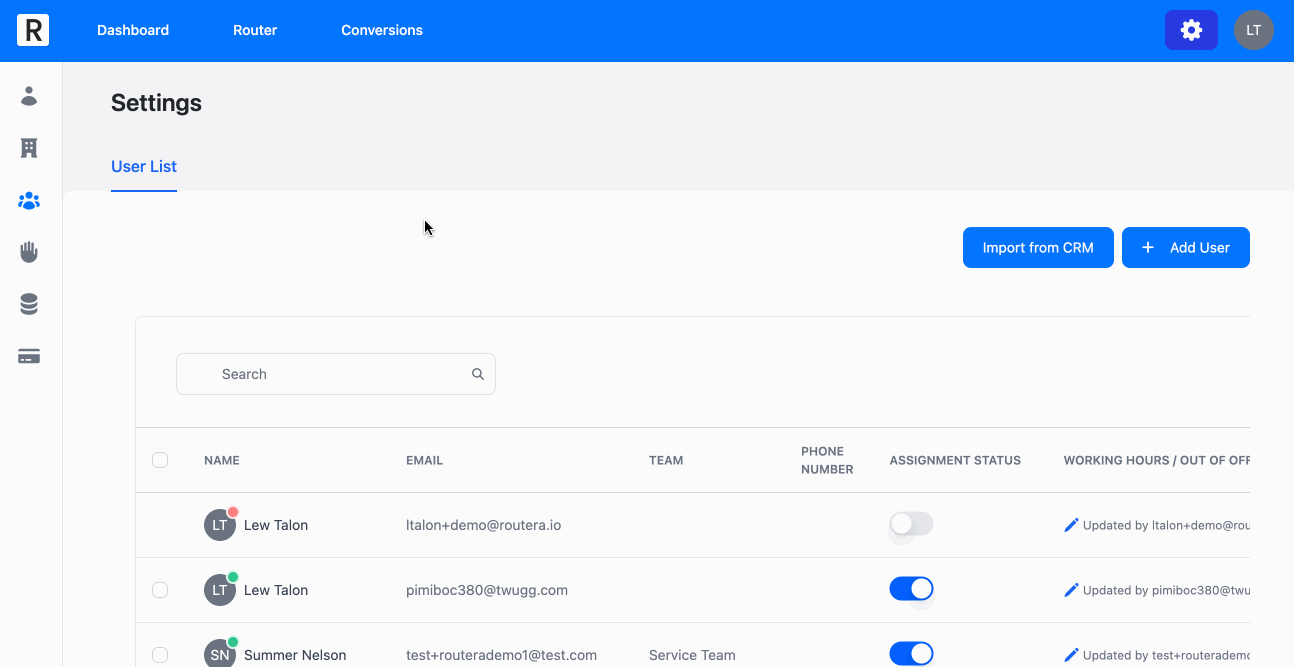
Step 3: Add users from your CRM
Once you've integrated with HubSpot you'll be able to start building a lead router.
First though let's import a few users to add to a new rotation.
- 1. Navigate to the users page
- 2. Click on import from CRM
- 3. Add the users who you want to add to this rotation
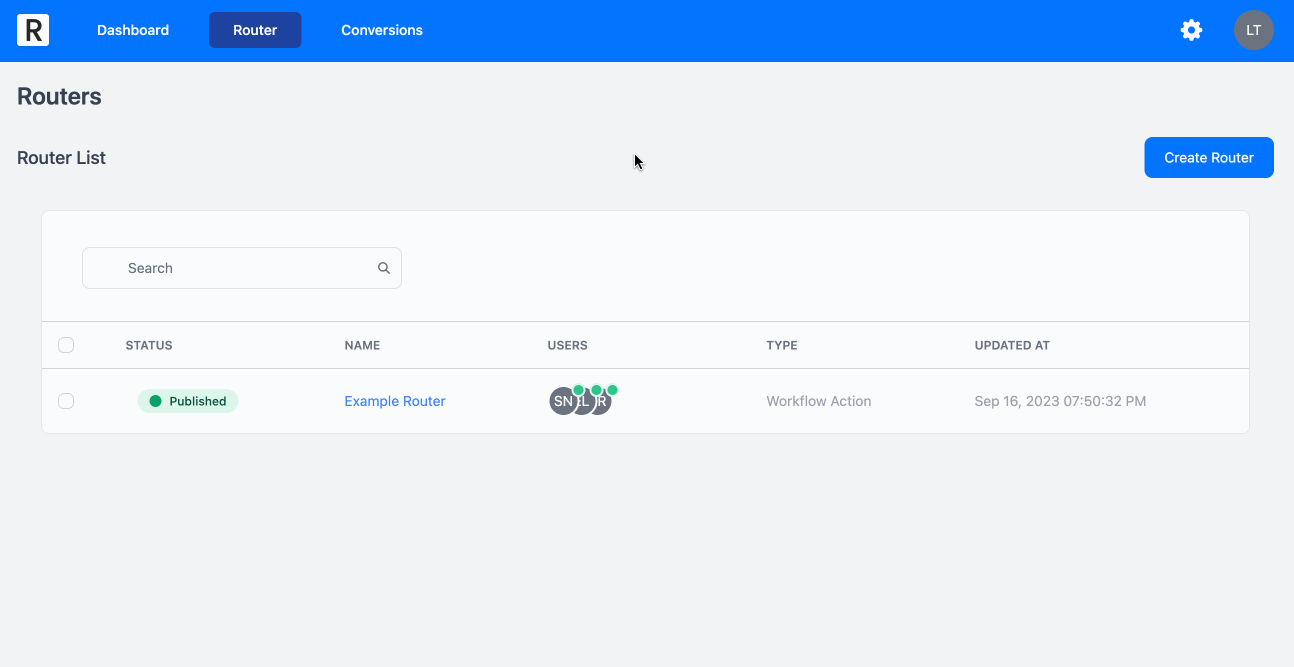
Step 4: Create a Router
Great, you've integrated with Routera and added users! Now you're ready to create a lead router.
- 1. Click Router on the main menu
- 2. Click Create Router
- 3. Chose a trigger: new record, field update, or workflow action. For ease, select workflow action
- so you can simply replace it within your current workflows.
- 4. Select the users in the rotation
- 5. Chose the model, in this example we will use percentage distribution and set percentages equal to 100
- 6. Review and Publish
- 7. Go to your HubSpot workflows and add the Routera action wherever within your process
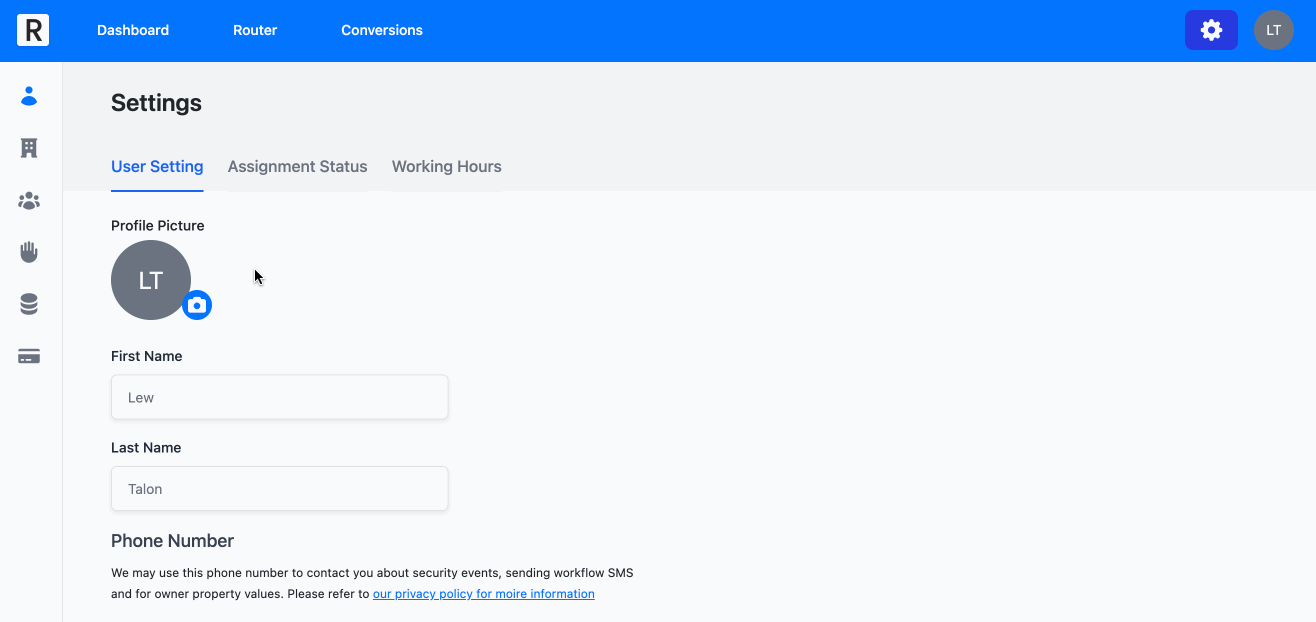
Step 5: Manage user availability and out of office dates
Nice! You have a live router, and you're making assignments. Now what? Well a user may request out of office dates
or maybe they have a specific schedule when they should be taking leads. You can easily manage user availability
as an admin:
- 1. Navigate to the settings page
- 2. Click on users
- 3. Manage each users availability by clicking the pencil icon
Optional: You can integrate with Google Calendar to automatically be marked as unavailable when busy, learn
more here.
Take it to the next level, measure success
Okay, you're routing leads, easily managing user availability either through the users page or by integrating your Google Calendar account. Now what?
You can measure the success of your routers, and change the router percentages based on each reps conversion rates. Simply create conversions:
- 1. Click on conversions
- 2. Create a conversion based on a field being met in HubSpot. For example, you may have a conversion based on the lead status being set to something like In Progress, or for deals you may have a conversion based on it landing in a specific deal stage.
Now you can navigate to your dashboard and see in one quick glance:
1. How many objects were routed by assigned date
2. Conversions by rep